Core Stability Exercises: The Foundation Every Workout Needs
If you have ever felt your lower back during a plank, lost your balance in a lunge, or wondered why your ab workouts do not seem to carry over to lifting, this is the missing piece. Core stability is the ability to keep your spine and pelvis steady while your arms and legs move and load pushes against you. Below I explain the three jobs your core actually does, how to breathe and brace, eight core stability exercises with cues, and a 12-minute routine that works as a warm-up or a standalone session. Most of it needs no equipment; a band and one dumbbell cover the rest.
Stability is not the same as abs
The abs are muscles. Core stability is a skill. A crunch trains your rectus abdominis to bend your spine; a plank trains your whole trunk to refuse to bend. Both are useful, and I have a soft spot for a fast circuit like my 10-minute abs workout when I want to feel something burn. But the skill that protects your back under a deadlift, keeps your hips level when you run, and lets you hold a warrior pose without wobbling is the refusing-to-bend one.
Think of your core as everything between your shoulders and your hips: the deep abdominal wall, the obliques, the muscles along the spine, the diaphragm above, the pelvic floor below, and the glutes that connect the whole thing to your legs. Stability work asks all of them to cooperate.
The three jobs of your core
Nearly every stability exercise trains one of three jobs. Knowing which is which keeps your training balanced.
Resisting extension. Gravity and load want to pull your lower back into an arch, especially when your arms go overhead or your legs reach away from you. Dead bugs, planks, and hollow holds train you to keep the ribs down and the pelvis steady against that pull.
Resisting rotation. Carrying a bag on one shoulder, throwing, running, and any single-arm exercise all try to twist your trunk. Pallof presses, bird dogs, and bear crawls teach you to stay square.
Resisting side bending. A heavy weight in one hand or standing on one leg pulls your spine sideways. Side planks and suitcase carries build the muscles along your sides that say no.
There is a fourth job that runs through all of them: transferring force between your hips and your shoulders. A strong core turns leg drive into a bar moving overhead, or a hip hinge into a kettlebell swing. If the trunk leaks, the power leaks with it.
Breathing and bracing
Before any of the exercises, learn the brace, because every one of them depends on it.
Lie on your back with your knees bent and your hands on the sides of your lower ribs. Inhale through your nose and try to push your hands apart, filling your belly, your sides, and your back rather than lifting your chest. Exhale slowly through pursed lips, and as the air leaves, feel your ribs drop toward your hips and your abdominal wall firm up. That firming is the brace.
For most exercises you want about 20 to 30 percent of your maximum tension, enough to feel braced but loose enough to keep breathing. Only the RKC plank asks for everything you have, and only for a few seconds. Never hold your breath for a whole set; breathe behind the brace, with short inhales and long exhales, while the tension stays.
Practice five slow breaths this way before you start the routine. It takes a minute and it changes everything that follows.
The eight exercises
1. Dead bug
Lie on your back with your arms pointed at the ceiling and your knees bent to 90 degrees directly above your hips. Press your lower back gently into the floor. Exhale and extend your right arm overhead and your left leg out until both hover above the floor, then return and switch sides.
Sets and reps: 2 to 3 sets of 6 to 8 per side.
Cues: The second your lower back lifts off the floor, you have gone too far; shorten the range. Move slowly, about three seconds out and three seconds back. If the full version is too much, keep the arms still and tap one heel to the floor at a time. If you have done any pilates, this will feel familiar; it is a close cousin of the single leg stretch.
2. Bird dog
Start on hands and knees with your wrists under your shoulders and your knees under your hips. Keep a neutral spine and a light brace, then extend your right arm forward and your left leg back until both are in line with your torso. Hold for one full breath, return, and switch.
Sets and reps: 2 sets of 6 to 8 per side, holding each rep for a breath.
Cues: Do not let your pelvis tilt or your weight shift sideways; imagine a glass of water balanced on your lower back. The leg lifts from the glute, not the lower back. This is the first of the five moves in my foundational prehab exercises, alongside the RKC plank and the bear crawl below, and it is the one I hand to nearly every new client.
3. RKC plank
Set up in a forearm plank with your shoulders directly over your elbows, feet together, and your gaze at the floor. Make fists, pull your shoulder blades apart, and press your forearms into the ground as if you were trying to drag your elbows toward your toes. Squeeze your glutes and hamstrings hard so your lower back flattens.
Sets and reps: 3 to 5 holds of 10 to 15 seconds, with 20 to 30 seconds of rest between.
Cues: This is a maximum-tension plank, not an endurance plank. If you can hold it for a minute, you are not squeezing hard enough. Ten seconds of shaking is the goal.
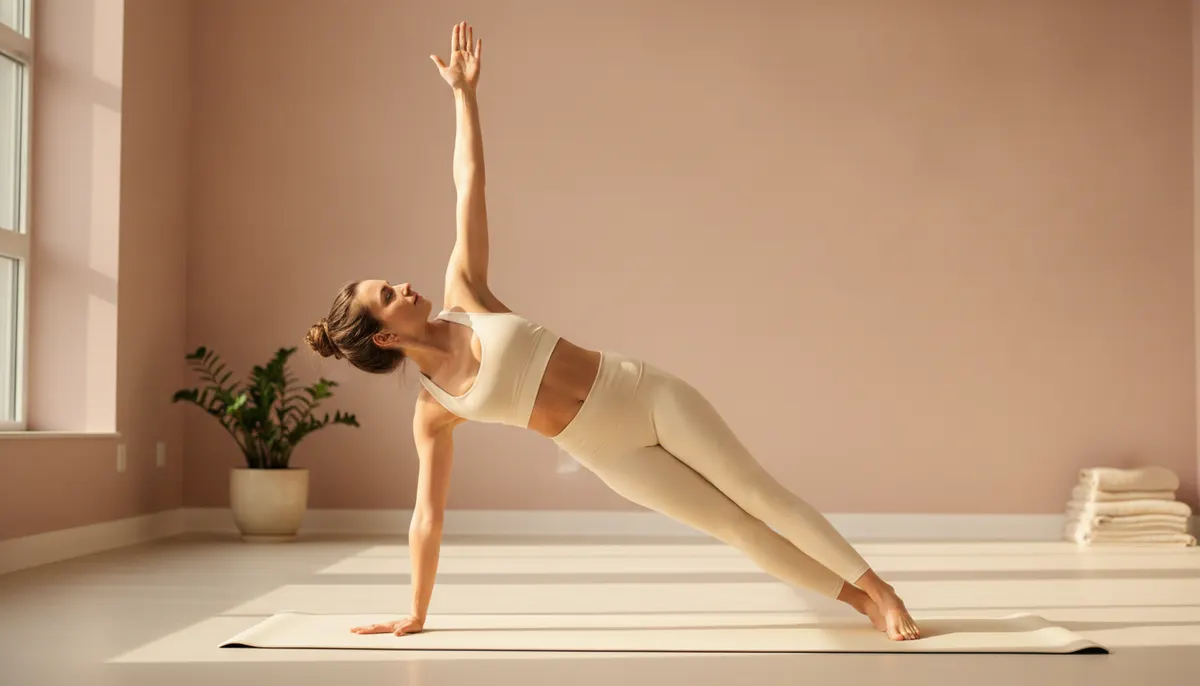
4. Side plank
Lie on your side with your elbow directly under your shoulder and your legs straight, feet stacked or staggered. Lift your hips until your body forms a straight line from head to heels. Rest the top hand on your hip.
Sets and reps: 2 holds of 20 to 40 seconds per side.
Cues: Push the floor away with your forearm so the shoulder does not collapse. Keep the hips stacked rather than rolling back. If the full version is too hard, bend your knees and lift from the knees instead of the feet. This is also a shoulder stability exercise, which is why the plank family shows up again in my shoulder prehab exercises.
5. Pallof press
Anchor a band at chest height. Stand sideways to the anchor, hold the band with both hands at the center of your chest, and step away until it is taut. Press your hands straight out in front of you, hold for two seconds, then bring them back to your chest.
Sets and reps: 2 to 3 sets of 8 to 10 per side.
Cues: The band wants to rotate you toward the anchor; your job is to stay perfectly square. Exhale as you press. If you feel yourself leaning or twisting, lighten the band or take a step closer. Half-kneeling, with the inside knee down, makes it harder to cheat with your legs.
6. Suitcase carry
Pick up one kettlebell or dumbbell in one hand, stand tall, and walk. That is the exercise. The weight tries to pull you sideways; you refuse.
Sets and reps: 2 to 3 walks of 30 to 40 steps per side.
Cues: Shoulders level, ribs down, free arm relaxed. Do not lean away from the weight to counterbalance; stand as if you were carrying nothing. Choose a weight heavy enough that you have to think about staying upright, which is often heavier than you expect.
7. Bear crawl
Start on hands and knees, then tuck your toes and lift your knees an inch off the floor. Crawl forward by moving your right hand and left foot together, then your left hand and right foot, taking small steps. Keep your back flat and your hips level with your shoulders.
Sets and reps: 2 to 3 sets of 8 to 10 steps forward and 8 to 10 steps back.
Cues: Knees stay low, hips stay quiet. Balancing a light object on your lower back is the honest test. If crawling is too much at first, simply hold the position with your knees hovering for 20 seconds.
8. Hollow hold
Lie on your back, press your lower back firmly into the floor, and lift your shoulders and legs off the ground with your arms reaching past your hips. Your body makes a shallow banana shape.
Sets and reps: 2 to 3 holds of 15 to 30 seconds.
Cues: The lower back stays glued to the floor the entire time; if it lifts, raise your legs higher or bend your knees. Keep breathing with short breaths. To make it easier, hold your knees bent and your arms forward. To make it harder, take the arms overhead.
The 12-minute routine
Set a timer and move through these in order. Rest only as noted.
- Breathing and bracing practice: 1 minute. Five to six slow breaths lying on your back.
- Dead bug: 90 seconds. Two rounds of 6 per side.
- Bird dog: 90 seconds. Two rounds of 6 per side, one breath hold each.
- RKC plank: 1 minute. Three holds of 10 seconds with 10 to 15 seconds of rest.
- Side plank: 90 seconds. One 30-second hold per side with a short rest between.
- Pallof press: 90 seconds. Two rounds of 8 per side.
- Suitcase carry: 90 seconds. Two walks of 30 steps per side.
- Bear crawl: 90 seconds. Three rounds of 8 steps forward and 8 steps back.
- Hollow hold: 1 minute. Two holds of 20 seconds with a 20-second rest.
Done as a warm-up, keep every set on the easier end and treat it as practice. Done on its own, two or three times a week, push the holds and add resistance as described below.
Progressions and regressions
Every exercise has an easier and a harder version. Change one variable at a time.
- Dead bug. Easier: heel taps with the arms still. Harder: hold a light weight in your hands or loop a band around your feet.
- Bird dog. Easier: extend only the leg, or only the arm. Harder: hold for three breaths, or draw a small square with the extended hand and foot.
- RKC plank. Easier: a standard forearm plank with a lighter glute squeeze. Harder: walk the feet a little wider and move the elbows an inch forward.
- Side plank. Easier: knees bent. Harder: lift the top leg, or put your feet on a step.
- Pallof press. Easier: a lighter band, or stand closer to the anchor. Harder: hold the pressed position for five seconds, or add a slow overhead reach.
- Suitcase carry. Easier: lighter weight, shorter walk. Harder: heavier weight, longer walk, or carry the weight overhead with a straight arm.
- Bear crawl. Easier: static hold. Harder: crawl backward, then sideways.
- Hollow hold. Easier: knees bent. Harder: arms overhead, or gentle rocking while keeping the shape.
A note on pain: muscles burning is expected. Pain in the lower back, a pinch at the hip, or anything sharp is not. Scale back, and if it keeps happening, see a physical therapist before adding load.
How this connects to the rest of your training
Pilates. Core control is the entire point of mat pilates; nearly every beginner pilates exercise is an anti-extension or anti-rotation drill in disguise. The neutral spine and “imprint” positions I explain in my pilates for beginners guide are the same lower-back positions you just practiced in the dead bug and the hollow hold.
Yoga. Yoga builds the same quality through plank, boat, and standing balances, with more focus on breath and less on load. If you have wondered which to add to your week, my honest comparison of yoga and pilates breaks down where each builds core strength and how to use both.
Strength training. The brace you practiced lying on the floor is the same brace that protects your spine in a deadlift or a loaded squat. If you are starting out, learn the brace first, then take it to the squat, deadlift, and row form notes in my beginner strength training guide.
Quick abs circuits. Once the brace is yours, movement-based circuits of crunches, Russian twists, and mountain climbers become safer and more effective, because the deep stabilizers hold the spine while the outer muscles do the work. Stability first, then the burn.
Where to go next
Your hips and your core share the job of keeping your pelvis steady, and tight hips undo a lot of this work by handing it to your lower back, so my 10-minute hip mobility routine is the natural next step. When you are ready to make both automatic, my 8-minute dynamic warm-up builds a short activation block, dead bug included, into every session.