Hip Mobility Exercises: A 10-Minute Routine for Tight Hips
If your hips feel like rusty hinges after a day at a desk, or your squat stalls at the same depth no matter how hard you try, this is for you. Below you will find a short explanation of why hips get tight, a two-minute self-test, and eight hip mobility exercises with the cues I give in person. They fit into a 10-minute routine you can do before a workout, after a long sit, or on a rest day. Nothing here requires equipment beyond a mini band and a wall.
Why your hips get tight
Your hip is a ball-and-socket joint built to move in every direction: forward, back, out to the side, and rotating in and out. The problem is that most of us use one or two of those directions and ignore the rest. Sitting parks the hip in one flexed position for hours, so the muscles across the front (the hip flexors) spend the day shortened and the glutes spend it switched off.
Training can do the same thing in a different way. Running, cycling, and most gym work move the hip in a straight line, forward and back, over and over. That builds strength in a narrow groove while rotation and side-to-side movement quietly disappear. It is one reason I push cross-training and strength work so hard in my running tips for breaking out of a rut: hips that only ever run eventually complain.
The result is a joint that feels stiff and “tight,” but the fix is rarely just stretching harder. Hips get tight because they lose range they do not use and strength in the ranges they rarely load. So the routine below does both.
Mobility is not the same as flexibility
Flexibility is how far a joint can go when something else moves it: gravity, your hands, a partner. Mobility is how far you can take a joint under your own control, with strength at the end of that range. You can be flexible and unstable (think of someone who can drop into the splits but cannot squat without their knees caving in), and you can be strong and stuck.
I care about mobility because it is the kind of range you can actually use in a squat, a lunge, a run, or a yoga class. That is why this routine mixes controlled movement, short holds, and two strength exercises. Passive stretching alone gives you range that fades by the next morning; owning the range with muscle is what makes it stick.
A two-minute self-assessment
Before you start, run these three checks and jot down what you find. You will retest in four weeks.
- The deep squat. Stand with your feet a little wider than your hips, toes turned out slightly, and sink as low as you can with your heels down. Can you rest at the bottom with your chest up for five breaths? Heels lifting or tipping backward usually points to ankle or hip restrictions.
- The 90/90 sit. Sit on the floor with your front leg bent to 90 degrees in front of you and your back leg bent to 90 degrees out to the side, both shins roughly parallel to the edges of your mat. Can you sit tall with both sit bones on the floor and no hands? If the back knee floats up or you lean hard away from it, that hip is short on internal rotation.
- The knee hug. Lie on your back, hug one knee to your chest, and look at the other leg. Does that thigh lift off the floor? If it does, the front of that hip is tight.
A stretch sensation is fine. A sharp pinch in the front of the hip, pain in the groin, or anything that radiates down the leg is not, and that is worth a visit to a physical therapist before you start loading the joint.
The eight exercises
Go slowly through all of these. Speed hides restrictions; slow movement finds them.
1. Hip CARs (controlled articular rotations)
Stand tall next to a wall and rest one hand on it. Brace your core lightly. Lift the outside knee to hip height, sweep it out to the side as far as you can, then rotate the hip so your heel swings up behind you and your knee points toward the floor. Bring the leg back to the start, then reverse the circle.
Cues: Keep your torso completely still. If your pelvis tilts or your back arches, make the circle smaller. Each circle should take five to eight seconds. Do 3 circles in each direction per side.
2. 90/90 transitions
Sit in the 90/90 position from the self-test. Keeping your chest tall and your hands hovering or resting lightly on the floor, lift both knees and rotate them to the other side so the back leg becomes the front leg. Pause, let both sit bones settle, then rotate back.
Cues: Lead with the knees, not the shoulders. If you fall backward, place your hands behind you at first and gradually use them less. Do 6 to 8 transitions, then stay on one side and hinge your chest forward over the front shin for 20 to 30 seconds. Repeat the hinge on the other side.
3. Deep squat hold
Set your feet slightly wider than hip-width, toes turned out a touch, and sink all the way down. Slide your elbows inside your knees, press your palms together, and gently push your knees outward with your elbows. Breathe into your belly and let your hips settle a little lower on each exhale.
Cues: Chest up, heels down. If your heels lift, put a rolled towel or a weight plate under them, or hold onto a door frame in front of you. Rock gently side to side to explore the corners of the position. This is also a quiet lesson in bracing: your trunk has to stay steady while your hips open, the same skill I teach in my core stability exercises. Hold for 30 to 45 seconds.
4. Figure-4 (or pigeon)
Lie on your back with your knees bent. Cross your right ankle over your left knee, then reach through and pull your left thigh toward your chest until you feel the stretch in the outside of your right hip. Keep your head and shoulders on the floor.
If you prefer pigeon, start on hands and knees, bring your right knee forward behind your right wrist with the shin angled across your mat, and extend your left leg straight back. Square your hips and fold forward over the front leg.
Cues: Flex the foot of the crossed leg to protect the knee. Choose figure-4 if pigeon pinches the front of the hip or bothers your knee; the stretch is nearly identical and the floor supports your back. Hold 30 to 45 seconds per side. This is one of my favorites to do with a partner gently pressing the thigh toward you, and there is an assisted version of it in my partner stretching guide.
5. Couch stretch
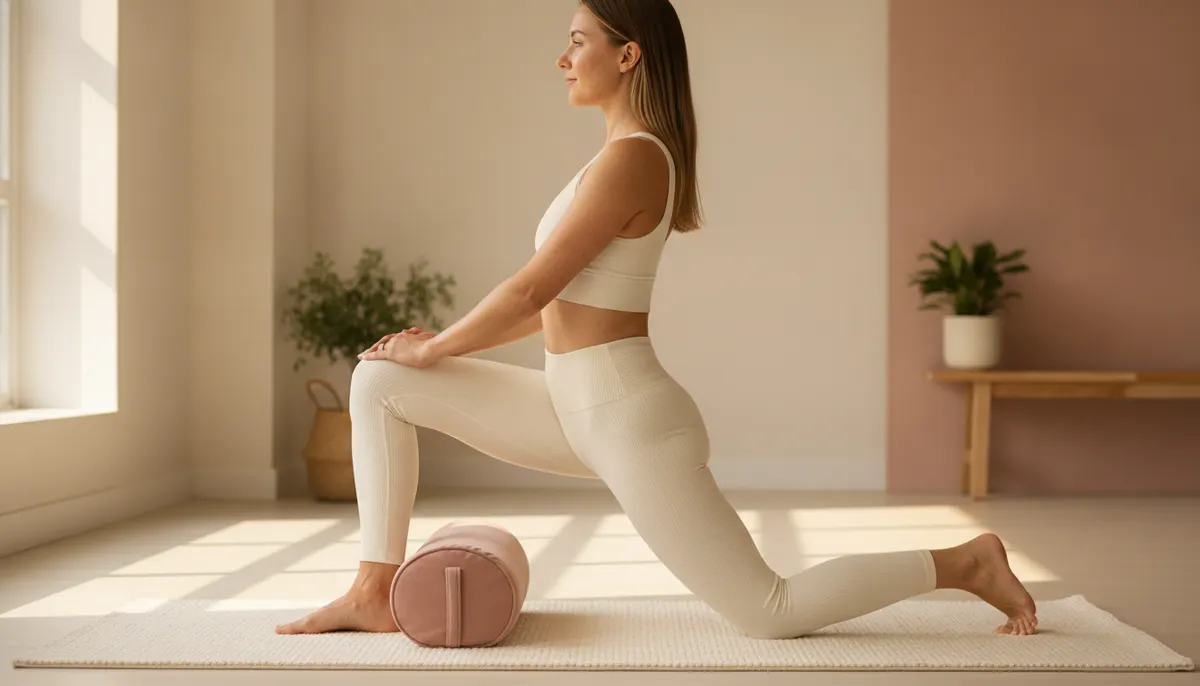
Kneel facing away from a wall or couch. Place your right shin up against the wall, with the knee in the corner where the floor meets the wall and the toes pointing up. Step your left foot forward into a lunge. Squeeze your right glute, tuck your pelvis slightly (think of pulling your belt buckle up toward your ribs), and slowly bring your torso upright.
Cues: The glute squeeze and the tuck are the stretch. Do not arch your lower back to feel more; that just bypasses the hip flexor. If it is too intense, move your knee a few inches away from the wall. Put a folded mat or a pad under the knee. Hold 45 to 60 seconds per side, breathing the whole time.
6. Adductor rock back
Start on hands and knees. Extend your right leg straight out to the side with the foot flat and the toes pointing forward. Keeping your back long, rock your hips back toward your left heel until you feel a stretch along the inside of the right thigh. Return to the start.
Cues: Stop the rock the moment your lower back starts to round. Exhale as you move back. Do 10 to 12 slow rocks per side.
7. Glute bridge
Lie on your back with your knees bent and your feet flat, hip-width apart, heels close enough that your fingertips can graze them. Exhale, press through your heels, and squeeze your glutes to lift your hips until your body makes a straight line from knees to shoulders. Hold for two seconds, then lower slowly.
Cues: Keep your ribs down; the lift comes from the glutes, not from arching the back. If your hamstrings cramp, walk your feet an inch closer. Do 12 to 15 reps. Mobility work without strength work is temporary, and the bridge teaches the glutes to own the range the couch stretch just opened.
8. Mini band lateral walks
Place a mini band just above your knees, sit into a quarter squat, and step sideways, leading with the glute of the stepping leg. Keep your feet at least hip-width apart the whole time so the band stays tense, and keep your torso upright and quiet.
Cues: Do not lean into the step, and do not let the trailing foot drag in and slacken the band. Do 10 to 12 steps in each direction, twice. This is one of the five foundational moves in my prehab exercise guide, where I cover band placement progressions and the toes-in trick for people who cannot feel their glutes working.
The 10-minute routine
Here is how the eight exercises fit together. Set a timer and move straight from one to the next.
- Hip CARs: 1 minute. Three circles in each direction, each side.
- 90/90 transitions: 90 seconds. Six to eight transitions, then a 20-second forward hinge on each side.
- Deep squat hold: 1 minute. Hold for 45 seconds, then stand and shake out.
- Figure-4 or pigeon: 90 seconds. Forty-five seconds per side.
- Couch stretch: 2 minutes. One minute per side.
- Adductor rock back: 1 minute. Ten rocks per side.
- Glute bridge: 1 minute. Fifteen reps with a two-second hold at the top.
- Mini band lateral walks: 1 minute. Ten steps in each direction, twice through.
If you only have five minutes, do the hip CARs, the 90/90 transitions, the couch stretch, and the glute bridge. That covers rotation, the front of the hip, and the glutes.
When to do it
Before squats, lunges, or deadlifts. Run the routine as the mobility block of your warm-up, but shorten the holds to 20 seconds each so your muscles are open rather than sleepy. The full structure I use is in my 8-minute dynamic warm-up, where the hips get their own step. Long passive holds right before heavy lifting are not what you want; brief holds followed by bridges and band walks are.
After sitting. This is where the routine earns its keep. If you have been at a desk for a few hours, five minutes of 90/90 transitions and the couch stretch undoes most of the damage. I do a version of this at lunch on the days my schedule is more laptop than studio, and I teach movement for a living. Nobody is immune to a chair.
On rest days. The full 10 minutes, done slowly with longer holds, is a perfect rest-day activity. It keeps blood moving through the muscles without asking anything of them.
After running. Runners benefit most from the couch stretch, the adductor rock back, and the glute bridge, done while the muscles are still warm.
What progress looks like over four weeks
Mobility changes slowly and then becomes suddenly obvious. Here is what I see in clients who do this routine four or five days a week.
Week one feels like nothing is happening. You will mostly discover how restricted you are, and the 90/90 position will feel awkward. That is normal. Your job is to show up and move slowly.
Week two brings small wins. The deep squat gets a little deeper, your heels stay down longer, and the couch stretch stops feeling like a punishment.
Week three is when the 90/90 transitions start to look like a movement instead of a struggle. Both sit bones stay down, and you notice your hips feel different when you stand up after sitting.
Week four is retest week. Go back to the self-assessment and compare. In my experience the knee hug test improves first, then the squat, then the 90/90 sit. Internal rotation is usually the slowest to change, so if that one lags, keep going.
One honest note: mobility is maintenance, not a project with an end date. Stop for a month and the hips drift back toward whatever your daily life asks of them. Two or three sessions a week is enough to keep what you have gained.
Common mistakes
Forcing range. Pushing into pain does not speed anything up; it makes your nervous system guard the joint harder. Aim for a 6 or 7 out of 10 stretch, never a 9.
Holding your breath. Every hold in this routine should come with slow exhales. If you are gritting your teeth, back off until you can breathe.
Letting the lower back do the work. Arching to deepen a couch stretch or rounding in the adductor rock back feels like progress and is not. Keep the spine quiet and let the hip be the thing that moves.
Skipping the strength pieces. The bridge and the band walks are the least glamorous part of the routine and the part that makes the rest stick.
Where to go next
The hips are only half of the maintenance picture. On a rest day, pair this routine with my shoulder prehab exercises and you have a 25-minute session that keeps both of the joints most likely to limit your training happy. And if taking that rest day makes you twitchy, my piece on rest days without guilt explains why recovery is part of training, not a break from it.